Sunday, June 30, 2013

Paper Bow Tutorial

Good morning!
I had a lot of requests for a tutorial on how to make the bow that I created for this card:
The bow is really simple to create.  Here are the instructions:
Supplies needed:
Card Stock or DSP of your choice
Big Shot
Ovals Collection Framelits
Stampin' Trimmer
Paper Snips
Glue Dots
SNAIL
Bone Folder
Button or Large Brad of your choice to embellish the center
1/2" Circle Punch
Bakers Twine (optional)
Embossing folder (optional)


To begin- cut out 2 of each oval.  I used the 2 smallest framelits from the Ovals Collection Framelits.  
Cut 2 card stock or dsp strips.  One measures 4 1/4" x 7/8" and the other measures 3 3/4" x 5/8"
If you are using card stock and want to emboss your bow- now is the time to do that. 
Next- trim the ends of the card stock strips so they look like a pennant (this forms the bow tails).
Using the bone folder- gently curl each oval.  
After each oval has been curled- gently fold each oval in half and secure with a Glue Dot.  Your ovals will now look like the ones pictured below:
Using the 1/2" Circle Punch- punch a circle.  Cover the circle in Glue Dots.  Take the 2 largest folded ovals and adhere them to the circle as shown below. 
Apply glue dots on the bottom edge of the smallest 2 folded ovals and layer them onto the tops of the large ovals to finish forming the bow.
Layer the smallest banner on top of the large banner and adhere with SNAIL
Using Glue Dots, adhere the bow to the center of the banner.
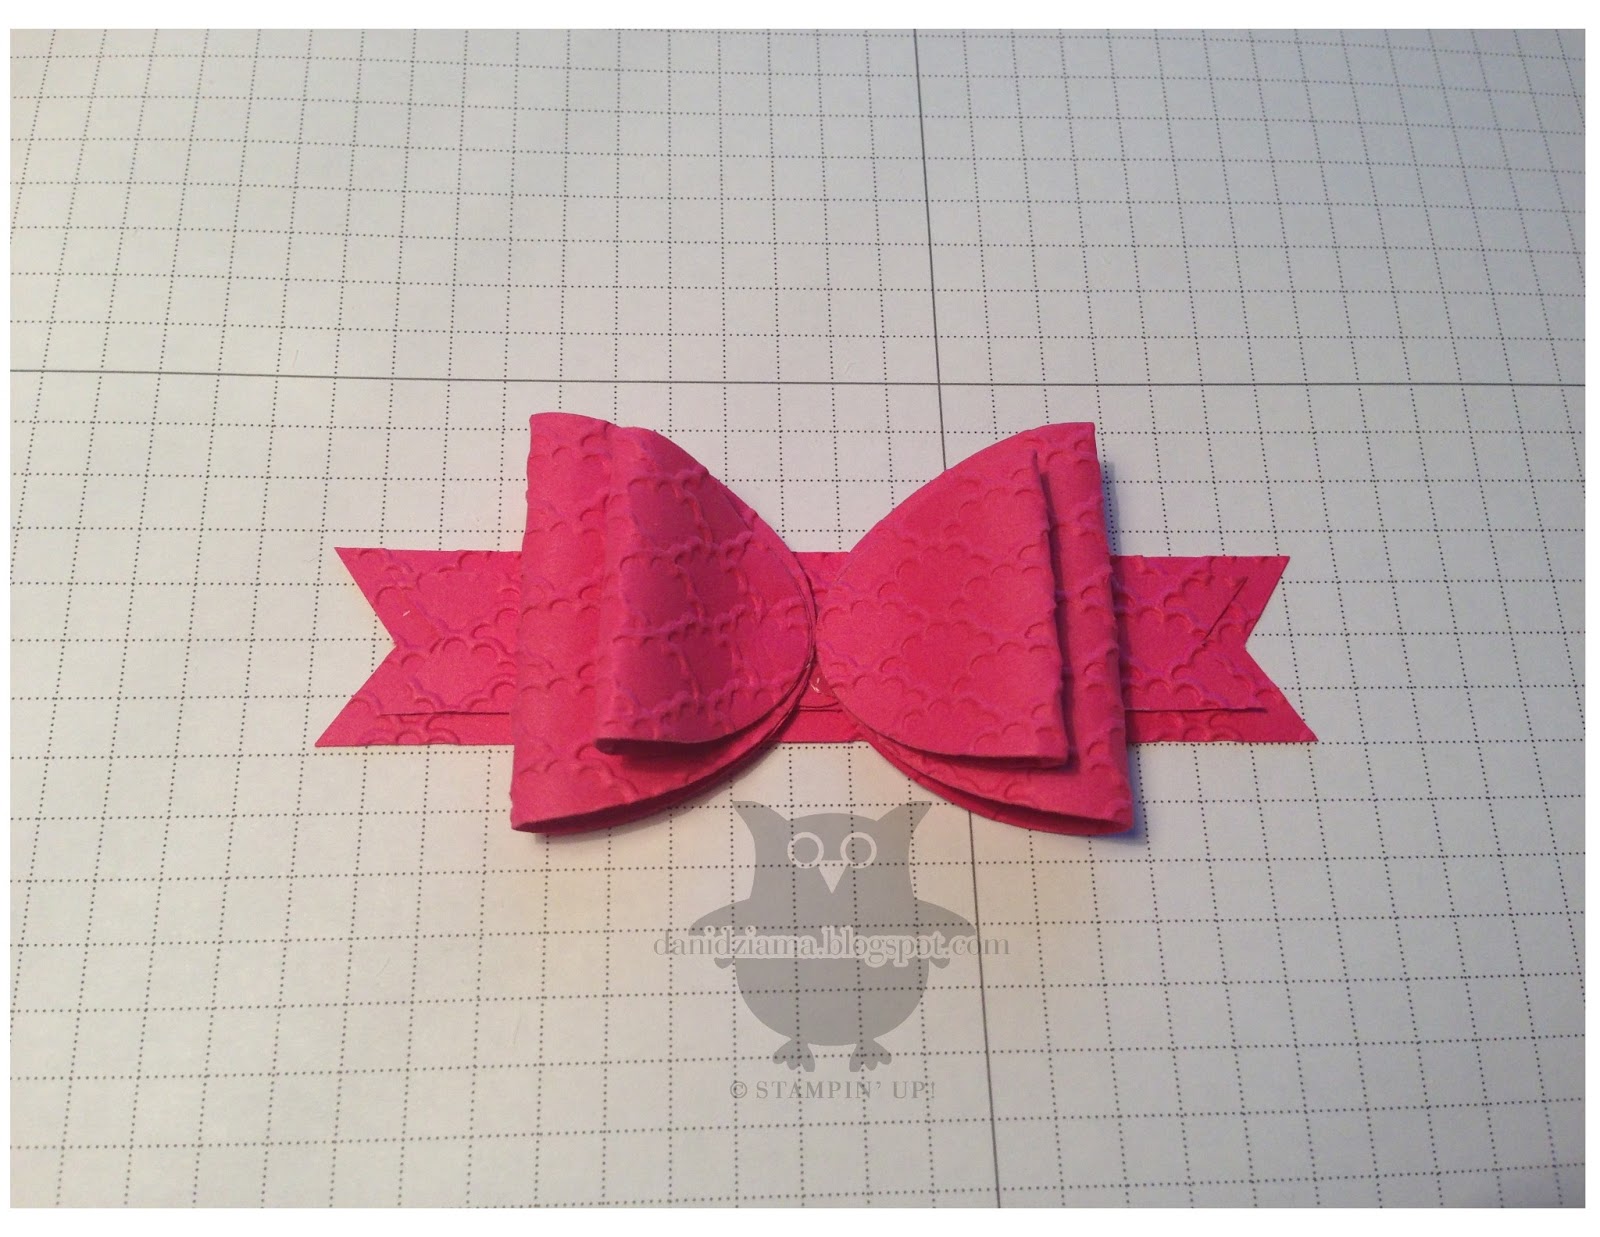
Finish off the bow by adhering a button or large brad to the center with Glue Dots.
That's all there is to it!  Easy peasy!  I used Stampin' Dimensionals to adhere the bow to my card but you can also use Glue Dots.  

Wanna change it up a little bit?  You can adjust the size of your bow by changing the size Oval Framelits.  You will also need to widen your tails depending on the size of your ovals.

Thanks for stopping by and have a wonderful Sunday!


Saturday, June 29, 2013

Am I dreaming?

Good morning!
I have some wonderful news to share with you all today!  As many of you know- I participated in the Stampin' Up! Artisan Design Team contest.  For this contest- entrants were asked to submit 5 full cards, 3 scrapbook pages and 2 3-dimensional projects.  This contest was a HUGE undertaking for me.  I had a lot of trying moments creating my submissions but in the end it was all worth it.  Yesterday afternoon at 2:48pm eastern time I got a phone call from Amy at the Stampin' Up! offices.  I AM A FINALIST!!!!!  I am so very happy and never in a million years did I think that I would be in the top 20 but here I am!  Can someone pinch me please because I must be dreaming!

In between the nerve wracking wait for a phone call and the tears after I actually received a phone call- I was able to create this beautiful card to share with you.  I used to Ovals Collection Framelits to make the bow.  I will create a tutorial for the bow on Sunday.
I hope you all have a wonderful weekend!!!
Card Ingredients:
Card Stock:  Island Indigo, Whisper White
DSP:  Gingham Garden
Stamps:  Label Love
Inks:  Island Indigo
Tools:  Stampin' Trimmer, Bone Folder, Paper Snips, Big Shot, Ovals Collection Framelits, Magnetic Platform, Artisan Label Punch, Vintage Buttons, Perfect Polka Dots Embossing Folder, Rhinestone Basic Jewels, Tea Lace Doilies, Glue Dots, SNAIL, Stampin' Dimensionals, Island Indigo Bakers Twine

Friday, June 28, 2013

Thoughts of You

Good morning!
Where does the time go?  I can't believe that in just 17 short days- I will be in Salt Lake City attending my very first Stampin' Up! Convention.  I cannot wait to go!  There are so many amazing demo's as well as Stampin' Up! employees that I can't wait to meet!
Today I have a card to share with you that I created using my favorite sentiments stamp set called Loving Thoughts.  I love everything about this set.  So many versatile sentiments and the font is beautiful!  I also made a few Creped Filter Paper Flowers to embellish my card with.  I love it!
Card Ingredients:
Card Stock:  Island Indigo, Whisper White
DSP:  Gingham Garden, Creped Filter Paper
Stamps:  Loving Thoughts
Inks:  Daffodil Delight, Melon Mambo, Island Indigo
Tools:  Stampin' Trimmer, Paper Snips, Bone Folder, Paper Piercing Tool, Rhinestone Basic Jewels, Big Shot, Floral Frames Framelits, Silver Mini Brads, Stampin' Dimensionals, SNAIL, Stampin' Spritzer bottles, 70% alcohol, Stamping Sponges

Thursday, June 27, 2013

Wonderfall!

Good morning!
Today I decided to change things up a little bit and create a card for the upcoming Fall season.  Yes- I realize it's early and NO I definitely am in no hurry for it to get here.  But I do absolutely adore the Wonderfall stamp set and the coordinating Autumn Accents Bigz die.  They are 2 of my favorite products!
Have a great Thursday!

Wednesday, June 26, 2013

Hello Wednesday!

Good morning!
Looks like I'll have plenty of time to stamp today as the forecast is filled with rain!  YAY for stampin' but I sure do wish it was sunny and pretty outside!  The sunshine puts me in a better mood (plus it helps take my mind off of things like the Artisan Design Team contest).  I'm hoping that the finalists are announced soon!  I swear the wait is the hardest part!
I have a card to share today.  It's short and sweet!  I hope you enjoy!
Card Ingredients:
Card Stock:  Island Indigo, Very Vanilla
DSP:  Modern Medley, Regals DSP stack
Stamps:  Secret Garden, Fabulous Phrases
Inks:  Island Indigo, Pool Party, Calypso Coral, Early Espresso, Soft Suede
Tools:  Stampin' Trimmer, Paper Snips, Big Shot, Top Note Die, Secret Garden Framelits, Bitty Banners Framelits, Calypso Coral Chevron Ribbon, Very Vanilla Seam Binding Ribbon, Glue Dots, Stampin Dimensionals, SNAIL, Pearl Basic Jewels, Stampin' Spritzer bottle w/water, Stamping Sponges, Designer Frames Textured Impressions Embossing folder

Tuesday, June 25, 2013

Thanks for Tuesday!

Good Morning!
Thankfully Monday is over.  I spent the majority of the day cleaning and trying to reorganize my bedroom.  I always thought that having a huge bedroom was a good thing.  Let me be the first to say that it is not.  We as a family have acquired so much extra stuff (or junk...whatever you wanna call it) that I don't know what to do with.  Now that I have all the extra stuff picked up and put away I'm tempted to move my stamp room into my bedroom.  Not sure my hubby will go for that one though.  A girl can dream, right?

The card I have to share with you today is one that I made for a monthly swap that I joined.  I love the layout and have been using it quite a bit lately!  I think it came out cute!  In fact- I liked it so much that I've decided it will be my customer "thank-you" card for July!  Will you be the next to receive one?

It's hard to see in the picture but the Daffodil Delight card stock pennant is embossed with the Stripes Embossing Folder and the edge of the stamped image is sponged with Daffodil Delight Ink.
Card Ingredients:
Card Stock:  Island Indigo, Daffodil Delight, Whisper White
DSP:  Gingham Garden 
Stamps:  Bright Blossoms, Fabulous Phrases
Inks:  Pear Pizzazz, Island Indigo, Daffodil Delight
Tools:  Stampin' Trimmer, Paper Snips, Big Shot, Stripes Embossing Folder, Island Indigo Bakers Twine, SNAIL, Stampin' Dimensionals, Glue Dots, Rhinestone Basic Jewels, Apothecary Framelits, Stampin' Sponges

Monday, June 24, 2013

Some like it HOT

Good Morning!
I hope everyone had a wonderful weekend!  I'm sure you've probably already noticed that I haven't posted for the past 2 days.  Fortunately the weather here has been beautiful so I took the opportunity to do some yard work and work in my flower beds.  I also fixed the weed trimmer all by myself!  I must say- I really do love to take things apart and put them back together again.  The weed trimmer needed new fuel lines so I figured it would be easier to change the entire fuel tank as opposed to just the fuel lines.  I was right!  Changing the fuel tank (which came pre-assembled with new fuel lines) was WAY easier than changing just the fuel lines.  In any case- it's fixed and I was able to take care of some much needed trimming!

I did have a chance to stamp over the weekend.  I decided to create an altered version of the My Paper Pumpkin kit.   I still used only the contents of the original kit.  For this card- I changed the orientation from landscape to portrait.  I think it's just as cute as the original version!
Want to join in on the My Paper Pumpkin fun?  Visit http://mypaperpumpkin.com today!  I would love to be your selected demo!  (Dani Dziama)
Have a great Monday!