
I had a lot of requests for a tutorial on how to make the bow that I created for this card:

The bow is really simple to create. Here are the instructions:
Supplies needed:
Card Stock or DSP of your choice
Big Shot
Ovals Collection Framelits
Stampin' Trimmer
Paper Snips
Glue Dots
SNAIL
Bone Folder
Button or Large Brad of your choice to embellish the center
1/2" Circle Punch
Bakers Twine (optional)
Embossing folder (optional)
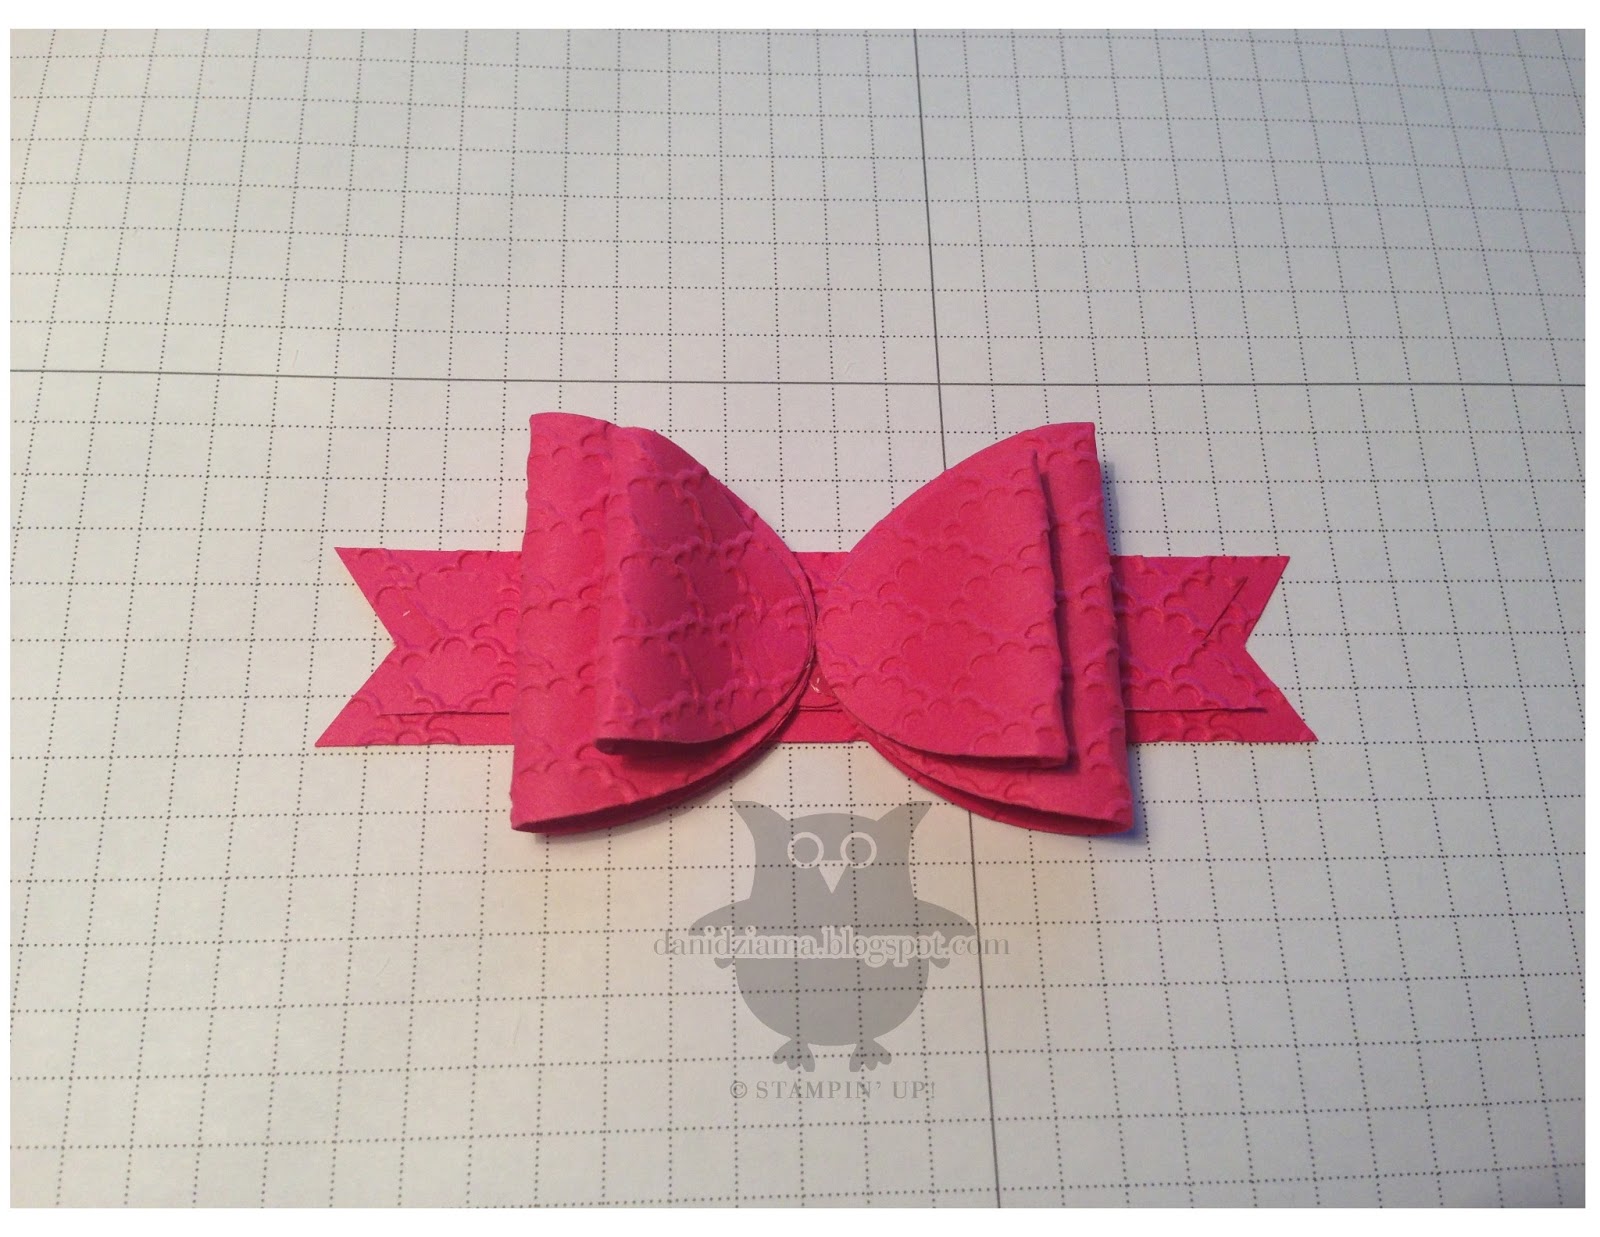
To begin- cut out 2 of each oval. I used the 2 smallest framelits from the Ovals Collection Framelits.
Cut 2 card stock or dsp strips. One measures 4 1/4" x 7/8" and the other measures 3 3/4" x 5/8"

If you are using card stock and want to emboss your bow- now is the time to do that.
Next- trim the ends of the card stock strips so they look like a pennant (this forms the bow tails).

Using the bone folder- gently curl each oval.

After each oval has been curled- gently fold each oval in half and secure with a Glue Dot. Your ovals will now look like the ones pictured below:

Using the 1/2" Circle Punch- punch a circle. Cover the circle in Glue Dots. Take the 2 largest folded ovals and adhere them to the circle as shown below.

Apply glue dots on the bottom edge of the smallest 2 folded ovals and layer them onto the tops of the large ovals to finish forming the bow.

Layer the smallest banner on top of the large banner and adhere with SNAIL

Using Glue Dots, adhere the bow to the center of the banner.
Finish off the bow by adhering a button or large brad to the center with Glue Dots.

That's all there is to it! Easy peasy! I used Stampin' Dimensionals to adhere the bow to my card but you can also use Glue Dots.
Wanna change it up a little bit? You can adjust the size of your bow by changing the size Oval Framelits. You will also need to widen your tails depending on the size of your ovals.
Thanks for stopping by and have a wonderful Sunday!
Thanks for sharing! Your bow is awesome!
ReplyDelete