Friday, February 11, 2022

TGIF Challenges: Sketch Challenge #tgifc355


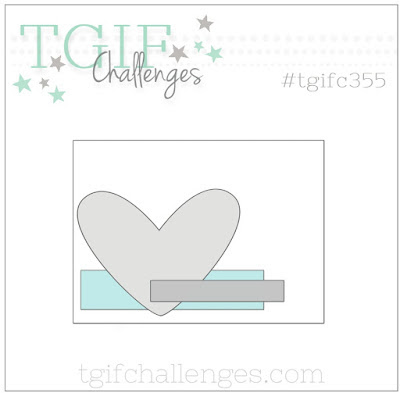
Hello Friends! Today I'm playing along with the TGIF Challenges Design Team. Today we are sharing projects created based on the sketch above.  I don't know about you- but I love sketch challenges because it takes the guesswork out of creating.   
The design is already planned so grab some stamps, inks, card stock, embellishments and create away!
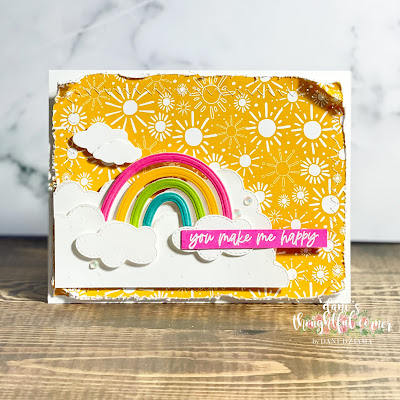

I used my favorite DSP Sunshine & Rainbows for this bright fun card.  Not gonna lie- I'm gonna be pretty sad when Sale-a-bration is over and we can no longer get this fabulous paper.  I LOVE it!

For this card- I used several different dies.  The Border Basics Dies were used to create the clouds beneath the rainbow.  The Give It A Whirl Dies were used to create the larger clouds at the ends of the rainbow.  The Brilliant Rainbow Dies were used to create the rainbow and smaller clouds.  

To add interest to the bright background- I distressed the edges and zig zag stitched a border all the way around.  

Why not join in on the fun and create a card of your own?  Simply create a card using the above sketch and submit it on the TGIF Challenges blog using the guidelines below!

Deadline for challenges is Thursday 2/17/2022 at 10am PST.


  • Uploaded projects need to be direct linked to your blog, Facebook, or other on line gallery.
  • Please post the TGIF Challenge graphic on your blog and link back to our site
  • Your project MUST be new and inspired by our challenge parameters
  • When sharing your project publicly, please use this weeks hashtag- #TGIFC355
  • Winning project(s) will be posted on next week's challenge on Friday 2/18/2022
  • Questions should be left in the comment section
  • Challengers can even post your cards on our FB page too!!  "Like us" while you're there :-)


Friday, January 28, 2022

Loaded Envelope Challenge


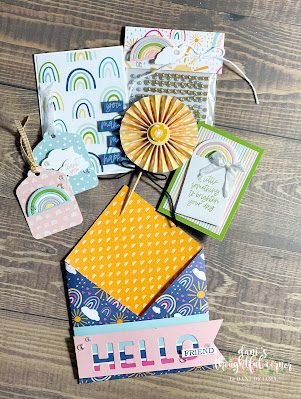
Hello Friends! Today I'm playing along with the TGIF Challenges Design Team.  Our mission was to create a loaded envelope.  I'm not going to lie- loaded envelopes are a new concept to me.  I had never seen one so I had to a little bit of research to see what they are all about!  

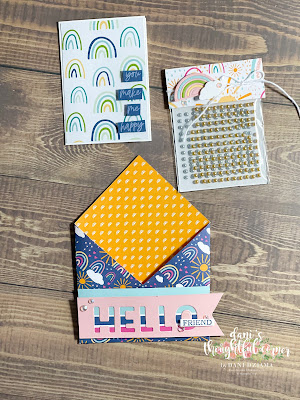
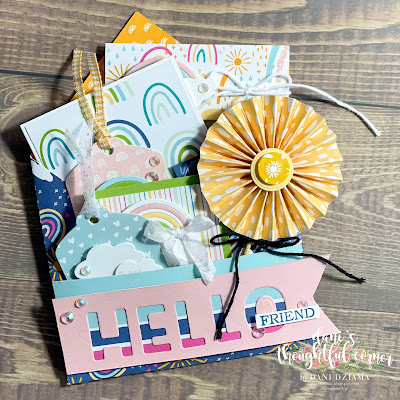
They sure are adorable!  They can be any size- large or small!  I created mine using a 6" x 6" sheet of Sunshine and Rainbows DSP from the Sale-a-bration catalog.  


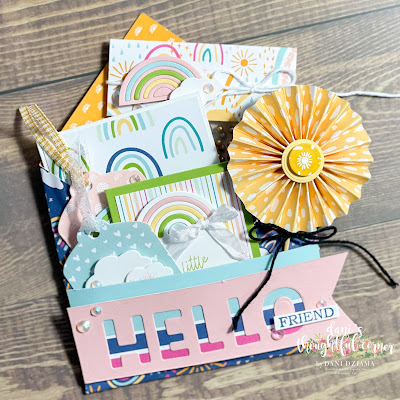
It has 2 pockets- a larger one and a smaller one.  The smaller one is just above the Hello Friend embellishment.  


Lots of goodies fit inside!  The larger pocket in the back- holds a miniature card as well as a package of Metallic Pearls. ...and still has room for more!


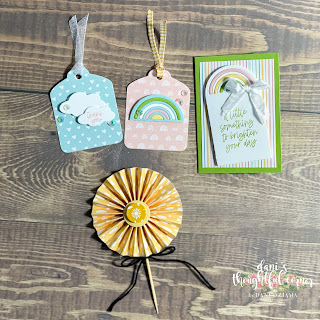
The smaller pocket holds 2 tags, a mini card and a mini lolli.

 
Put it all together and this is what ya get!  Super cute!!!
I definitely see myself making lots of these in the very near future!  


Why not join in on the fun and create a loaded envelope of your own?  Simply create a loaded envelope and submit it on the TGIF Challenges blog using the guidelines below!

Deadline for challenges is Thursday 2/3/2022 at 10am PST.


  • Uploaded projects need to be direct linked to your blog, Facebook, or other on line gallery.
  • Please post the TGIF Challenge graphic on your blog and link back to our site
  • Your project MUST be new and inspired by our challenge parameters
  • When sharing your project publicly, please use this weeks hashtag- #TGIFC353
  • Winning project(s) will be posted on next week's challenge on Friday 2/4/2022
  • Questions should be left in the comment section
  • Challengers can even post your cards on our FB page too!!  "Like us" while you're there :-)
Supply List:
Card Stock:  Basic White, Granny Apple Green, Blushing Bride, Pool Party, So Saffron, Misty Moonlight
DSP:  Sunshine and Rainbows 6"x 6" DSP 
Stamps: Rainbow of Happiness, Calming Camilla 
Inks:  Granny Aple Green, Misty Moonlight, White Craft Ink
Tools/other supplies:  Bumblebee 1/4" Gingham Ribbon, White 3/8" Glittered Organdy Ribbon, Brilliant Rainbow Dies, Playful Alphabet Dies, Sweet Hearts Dies, Baker's Twine Essentials Pack, White 1/4" Crinkled Seam Binding Ribbon, Iridescent Rhinestones Basic Jewels

Thursday, January 13, 2022

OSAT Blog Hop: Happiness is...

Good morning stampin' friends!  Today's projects were created for the One Stamp At A Time Blog Hop.  Our theme this month is Happiness is....  For me- happiness is a lot of things- but mostly a new Stampin' Up! Catalog!  The new January-June Mini Catalog was released last week and I LOVE it!  There are so many fabulous products!  


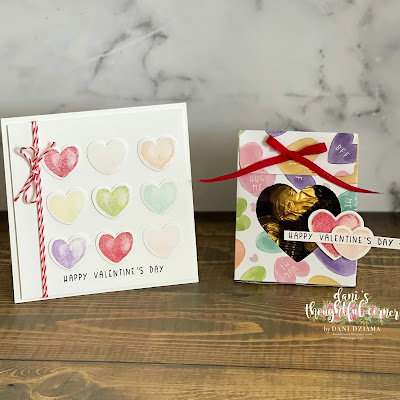
The card was created on a 4-1/4" square Basic White card base with a 4" Basic White top layer.  Nine heart images were stamped using the Sweet Conversations Stamp Set and cut out using the coordinating Sweet Heart Dies.  They were individually adhered to the top layer using Mini Glue Dots.  I then wrapped some Poppy Parade/White Baker's Twine around the left side and tied a small bow.


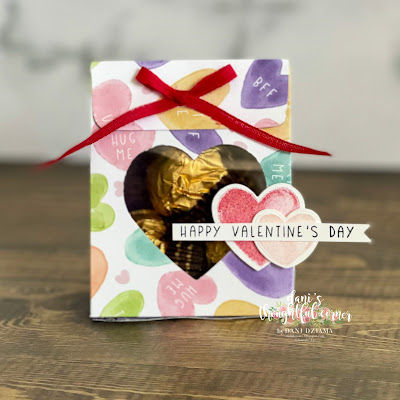
My 3D project is a cute little treat box that holds 3 delicious Ferrero Rocher treats.  
It was created using the Sweet Talk 12" x 12" DSP.  The heart window was punched out using the Heart Punch Pack and embellished with stamped heart images/sentiment from the Sweet Conversations Stamp Set. 
I hope you have enjoyed my projects for today!  Please be sure to join us on the rest of the hop by following the links below!


Wednesday, January 12, 2022

Valentie's Mini Tiered Tray

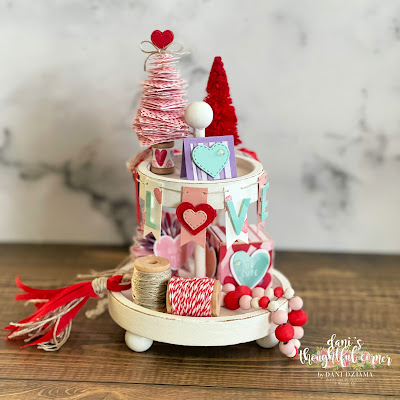
Last week my friend Becky shared the most adorable little tiered tray on her Instagram and I was on a mission to find one for myself. Somehow I managed to miss them at Christmas time when they were sold at Hobby Lobby but thankfully I managed to snag one from someone online.  


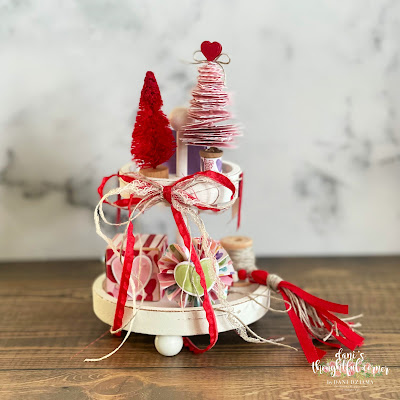
As you can see in the picture- the tiered tray itself is itty bitty!  It measures 5-1/2" tall by approximately 4" wide.  It's pretty much the same size as an A2 size card!  Since I chose to make this a Valentine's Day themed tray- I thought it was appropriate that I created miniature decor to fit the theme.  
On the top shelf- is the smallest greeting card I've ever made!  It's 1" square.  The outside features a small heart cut from Pool Party Card Stock and the Give It A Whirl Dies.  The inside is stamped with  the "Happy to have you in my life" sentiment.  

Also on the top shelf is my favorite element- the miniature paper tree.  It was created by using various squares sized from 1/4" to 1".  The tree base is a 1/2" wooden spool with a toothpick in the center.  


For the bottom tray- I created a tiny paper lollipop that measures just 1-1/2".  It was embellished using conversations hearts cut from the Sweet Talk 12" x 12" DSP.  A tiny wooden block was covered using a striped pattern and a small heart pattern from the Sweet Talk DSP.  Conversation hearts were put on 4 sides so that a sentiment can be seen from all angles.  Two 1" wooden spools were wrapped with Poppy Parade/White Baker's Twine (from the Fan Baker's Twine) and Linen Thread.  
The mini beaded garland was created using wooden jewelry beads that measure 6mm, 8mm and 10mm.  All beads were painted and then strung onto a piece of Linen Thread.  A small tassel was created using half the width of  3/8" Real Red Faux Linen Ribbon and some Linen Thread.
The adorable little LOVE banner around the top layer ties it all together!
Thanks for stopping by!

Monday, January 10, 2022

Monday Montage #205


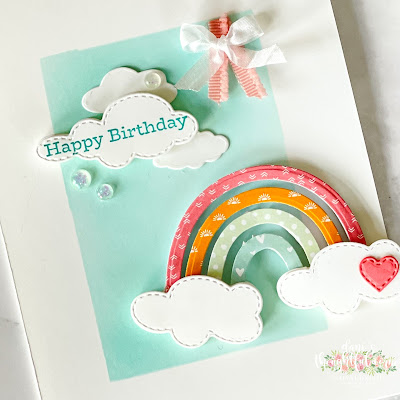
Hello stampin' friends! Welcome back for the Monday Montage Blog Hop!  Today I have an adorable project to share featuring the Brilliant Rainbow Dies.   The Rainbow Of Happiness Bundle is probably my most favorite product in the entire Mini Catalog.  It's super cute and fun!


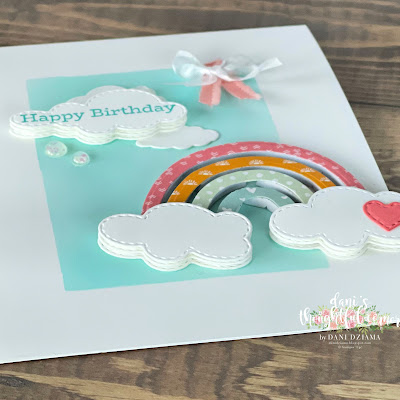
 This card was created on a Basic White card base.  I masked a rectangle onto the card base and colored it in using a Stampin' Blending Brush and Bermuda Bay Ink.  Using 4 different patterns of DSP from the Sunshine & Rainbows 6"x6" DSP and the small rainbow die from the Brilliant Rainbow Dies- I cut out a small rainbow.  


Next, I began working on clouds.  The two smaller clouds above the rainbow were cut using the Brilliant Rainbow Dies and a Basic White Card Stock scrap.  The 3 larger clouds were cut using the Give It A Whirl Dies and Basic White Card Stock.  It's difficult to see in the picture above- but each of the larger clouds consist of 3 layers. Layering the clouds allowed for added dimension to the card front.  


As you can see from the picture above each part of the rainbow was adhered to the card base using Foam Adhesive Strips.  They are not visible when looking straight on to the card.    The clouds are all layered using Stampin' Dimensionals.  The Happy Birthday sentiment is from the For The Record Stamp Set and was stamped in Bermuda Bay ink before the top cloud layer was adhered.  


Thanks for stopping by!    Please be sure to click the links below to navigate throughout the hop!  BACK will take you to Cheryl Curtis and NEXT to Elizabeth Price.  


Card Ingredients:
Card Stock: Basic White
DSP: Sunshine & Rainbows
Ink: Bermuda Bay 
Stamps: For The Record
Tools/Other supplies: Opal Rounds, Brilliant Rainbow Dies, Give It A Whirl Dies (small stitched heart and large clouds) , White 1/4" Crinkled Seam Binding Ribbon, Blushing Bride Frayed Grosgrain Ribbon (retired)

Monday, December 6, 2021

Monday Montage


Hello stampin' friends!  What do you prefer?  Traditional Red/Green or non-traditional colors for Christmas?  I think non-traditional colors are gorgeous as they remind me of vintage mercury glass ornaments.  The kind I'd see on my grandma's tree every year when I was a child.  


This card was created using a Coastal Cabana card base.  The Basic White top layer features snowflakes in Shimmery White Embossing Paste that were created using the Adorning Designs Decorative Masks.  On Fluid 100 Watercolor Paper- I made a scrap of watercolor image from Melon Mambo and Bermuda Bay inks.  All tree images were cut out using the Christmas Trees Dies.  


The large tree and the sentiment were stamped in VersaMark Ink and heat embossed in white (from the Basics Stampin' Emboss Powers).  Opal Rounds and Subtle Shimmer Sequins add some bling.  The silver Simply Elegant Trim was the perfect bow to tie in the DSP (from the Whimsy & Wonder Specialty DSP).

Thanks for stopping by!    Please be sure to click the links below to navigate throughout the hop!  BACK will take you to Cathy Casey and NEXT to Elizabeth Price.  


Card Ingredients:
Card Stock: Basic White, Coastal Cabana, Melon Mambo, Fluid 100 Watercolor Paper
DSP: Whimsy & Wonder Specialty DSP
Ink: VersaMark, Bermuda Bay Re-Inker, Melon Mambo Re-Inker
Stamps: Frosted Gingerbread, Whimsical Trees
Tools/Other supplies: Palette Knives, Shimmery White Embossing Paste, Christmas Trees Dies, Opal Rounds, Simply Elegant, Layering Circles Dies, Basics Stampin' Emboss Powder, Heat Tool, Stampin' Dimensionals, Stampin' Seal

Sunday, December 5, 2021

Creation Station: Anything But A Card


Do you like to create projects other than cards?  I know I do!  There's just something magical about making a 3D project or a home decor piece.  I love making things that make others smile.  
Today's project isn't overly difficult to create but it's super cute and I know the recipients will be happy!  Afterall- who doesn't love chocolate!


This month we are creating projects that are Anything But A Card.  It can be home decor, an ornament, a box or a bag or just about anything in between- as long as it's not a card!  Stampin' UP! makes this easy!  In the Annual Catalog I found these adorable Mini Jam Jars.  They make the cutest little treat holders!


Want to make these yourself?  Here are the BASIC instructions:
Cut a 4-3/4" square piece of card stock and score all 4 sides at 1-1/4".  Snip flaps on opposite sides and fold into a box. Secure using Multipurpose Liquid Glue.
Cut a 2-1/4" x 3-1/2" piece of card stock and coordinating DSP.  Adhere together and round the corners using the Detailed Trio Punch.  Attach this piece inside the box along the inner back panel and secure using Multipurpose Liquid Glue.  
Wrap a 1" x 10-1/2" strip of coordinating DSP around the box to decorate.  Decorate as you like!


The above view shows both the jar and the treat holder.  I created all 4 of mine using the gorgeous Peaceful Place DSP, Wonderful Snowflakes,  Merry Snowflakes Stamp Set,  Stitched Snowflake Dies, Opal Rounds, White Glittered Organdy Ribbon, and Smoky Slate/Basic White Card Stock.  


I sure do hope the flight attendants on our trip to Florida will enjoy their treats!  I haven't filled the jars yet- but they will have Lindor Truffles in them!  


Wanna see some more fun 3D projects?  Why not follow along on our hop!  Next up is the fabulous Sara Nell Langland.