Sunday, February 19, 2017

Monday Montage #88


Hello there and welcome back for the bi-weekly Monday Montage blog hop. I'm so happy you joined us!  Be sure to visit all 10 stops to see what other amazing designers have created to share with you.

I've been playing around with the Basket Bunch stamp set and coordinating Basket Builder Framelits  for the past few weeks.  I love this adorable set and I know you will too! There are so many possibilities!

My first card is just a funny card.  There has been a meme with this saying on it around for years.  So when I began to play around I couldn't resist! 😂😂😂


My second project is a sweet little card.  It has a beautiful Soft Sky watercolor washed background and two of the most adorable little chicks ever!  I stamped one onto Daffodil Delight card stock and the other onto the Daffodil Delights polka dotted paper from the Brights Collection DSP stack.  Super cute!


Thanks for stopping by!  Please be sure to visit all the stops on the hop! Click the NEXT button to go to the fabulous Dara Gloden or click the BACK button to head on over to the lovely Cathy Casey.  


Thursday, February 16, 2017

Stampin' UP! Artisan Blog Hop- Lift Me Up Mini Photo Book

Hey there!  Welcome back to another Stampin' UP! Artisan Design Team Blog hop!  If you are hopping with us today then you may have arrived here from the fabulous Cathy Caines.  Isn't she amazing? As we are a group of 20 demonstrators from around the world- our blogs are written in many different languages.  Please be sure to use Google Translate so that you can follow along in your language.  You don't wanna miss out on any of the fabulous details!


For our second hop this month we are featuring the Lift Me Up stamp set from the Occasions Catalog.  I love this set for many reasons.  Hot air balloons have always been a favorite of mine.  As a child my parents would always take us to Wellsville, NY to see the Great Balloon Rally.  It was a family tradition that we looked forward to every summer!

My first project that I have to share is a mini photo book.  This little album measures 3" x 4" and was created using the coordinating Carried Away DSP from the Sale-A-Bration catalog.  


There are a total of 8 pages in this adorable little album.  FYI: this little book was created for someone else so I have not added pictures or journaling to any of the pages.  I wanted to leave that option open for the recipient.


Each page of the mini book has either a place for journaling or a pocket to store a little keepsake. 


All pages and tags are embellished with coordinating DSP or other fun elements.


When creating the tags and photo mounts I chose coordinating colors for both pages.  Since the Carried Away DSP has such a wide variety of colors it was easy to pick my favorites and still feature each two page layout with a different color.  


Here is a close up of each tag.  They are shown in the order they are in the mini book.


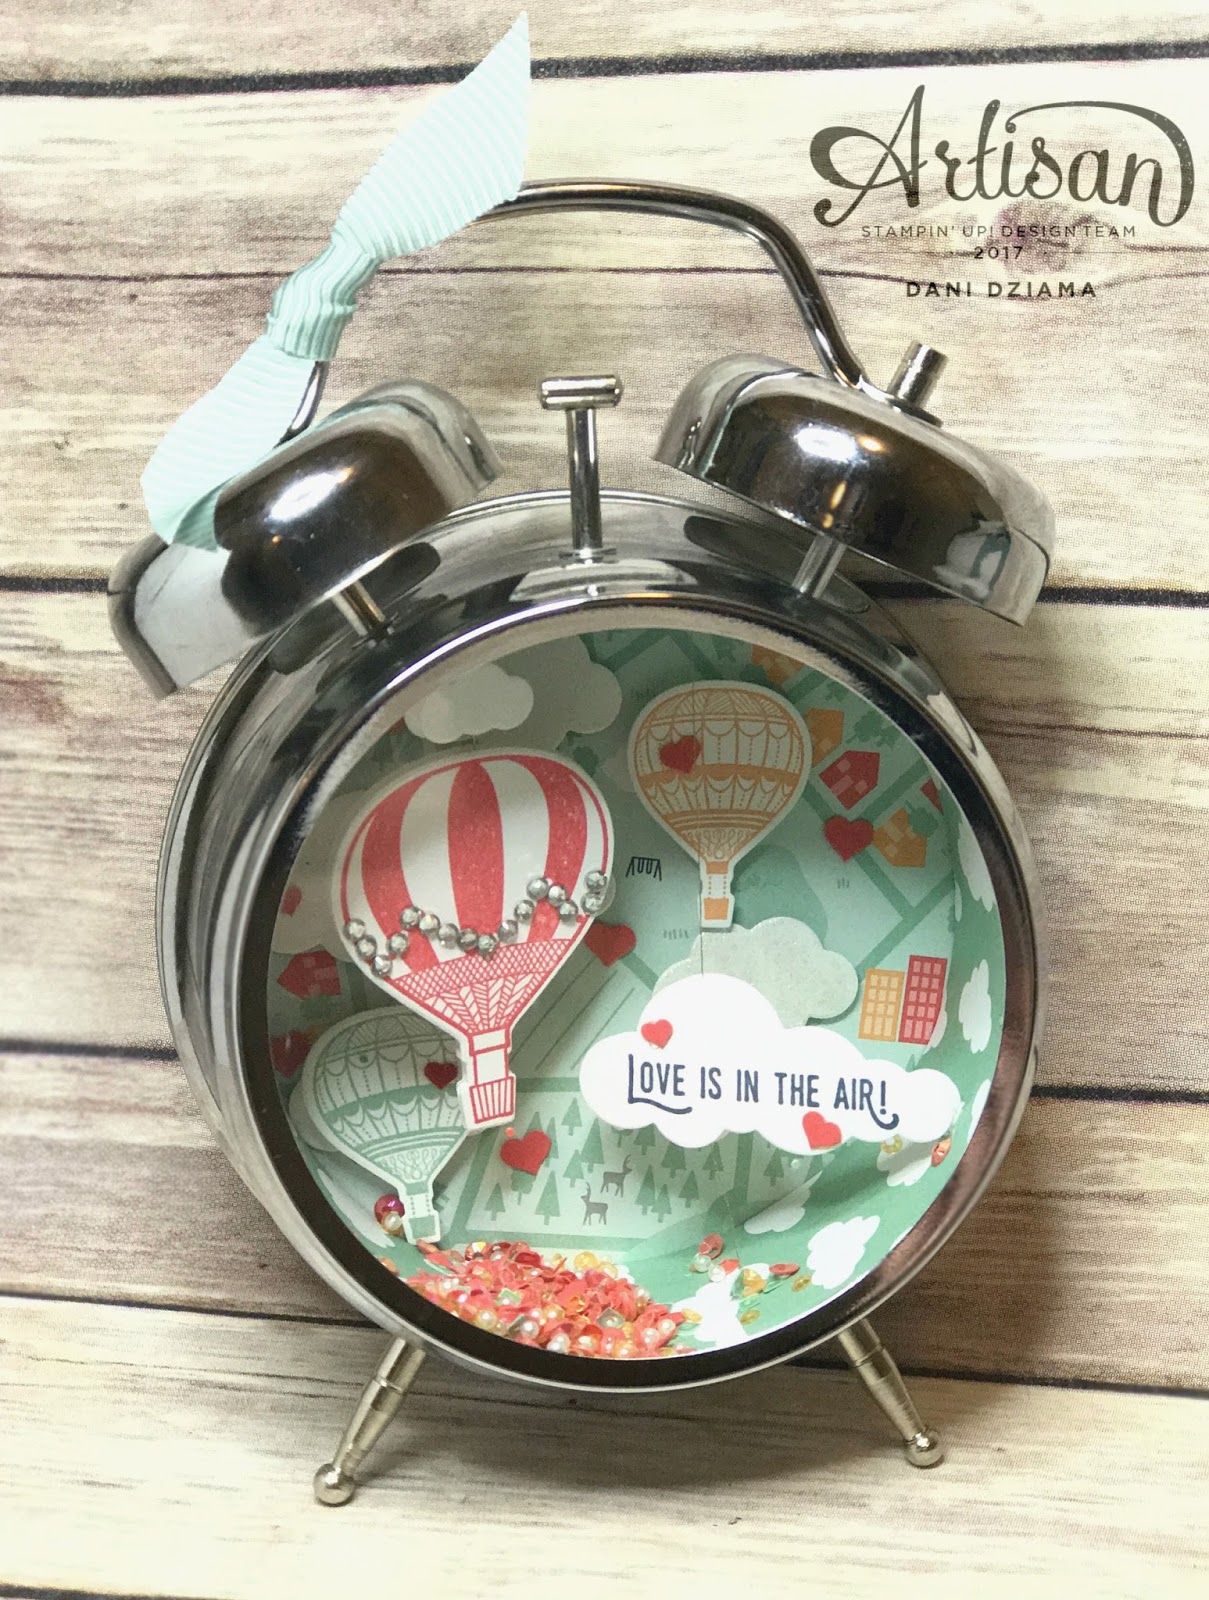
My second project for today is my favorite.  I love everything about it. 💕💕💕
Unfortunately since the front of this piece is covered in glass it's very difficult to photograph.  I tried to get close ups and it was just too much glare.  This is a really amazing project to see in person.  It's beautiful!  


Once again I have used the the Carried Away DSP from the Sale-A-Bration catalog.  One of the patterns from the DSP is a Mint Macaron background filled with nothing but fluffy white clouds.  If you look closely in the picture (look inside and to the right along the inner edge) you can see that I have lined the entire clock with this pattern.  The very back of the scene was covered with the DSP that was created to look like you're in the clouds looking down at the ground.  The Watermelon Wonder ballon and the Love is in the Air cloud appear as though they are suspended in mid air.  To create this effect- I sandwiched two die cuts together using Stampin' Dimensionals and some Metallic Gold Thread.  The thread was then inserted through a tiny hole in the top of the cloud layer and adhered with a glue dot.  Sprinkles embellishments were added to finish it off.

I hope you have enjoyed my projects and will continue on your blog hop journey to the fabulous Holly Stene.  You will LOVE what she has created this time around!

Thanks for stopping by!


Sunday, February 12, 2017

Yummy in my Tummy

Hey there stampers!  Today I'm sharing a technique that Sara Douglass shared on the Stampin' UP! CEO Facebook page a few weeks ago.  It uses the Yummy in my Tummy stamp set, a Fine-Tip glue pen and some Cucumber Crush reinker.   What do these ingredients make you ask?  Why SLIME of course!  SO fun!  


To create my Valentine, I began by inking up the smaller monster in Basic Black Archival Ink and stamping him onto a piece of Whisper White card stock.  I then opened up my Fine-Tip glue pen and added 5 drops of Cucumber Crush reinker.  I then replaced the top and gently swirled it around to mix.  


Next I began to outline the monster and fill him in.  After the monster was all filled in- I let it dry for about 30 minutes or so.  The slime varies in color leaving some spots darker and some lighter.  As you can see from the pictures- the slime likes to pool at the bottom creating a real slime look!
Isn't it fun?  These are super easy to create and don't take up much time at all!  

Thanks for stopping by!


Thursday, February 9, 2017

Lucky Elephant

Hey there!  Have you ever ordered something that you absolutely could not wait to arrive?  That's how I was today with my latest round of purchases from the Occasions Catalog.  I swear the end of my work day took FOREVER to come!  I just wanted to get home to play!

  You see, in my order there was several fabulous new sets.  Lucky Elephant, Bookcase Builder, Yummy in my Tummy, Just Keep Swimming, and so many more!  I also got several other goodies like the BRAND NEW Sale-A-Bration products!  (I'll share those beauties in another post!)  

The first set I chose to create with was Lucky Elephant.  I just love this set.  The elephant and the good luck sentiment are a perfect match!  


I started my card out by inking the good luck sentiment in Crumb Cake ink and randomly stamping it around the card base.  I then stamped the elephant in Basic Black Archival Ink onto Crumb Cake card stock. I wanted the elephant to pop off the card a bit so I fussy cut him and adhered him to the card base using Stampin' Dimensionals.  A double Linen Thread bow and some gold sequins from the Cupcakes and Carousels set were added to finish the card off. 

I hope you enjoyed my card!  Thanks for stopping by!


Sunday, February 5, 2017

Monday Montage #87


Hello there and welcome back for the bi-weekly Monday Montage blog hop. I'm so happy you joined us!  Be sure to visit all of the stops to see what other fabulous projects we have created to share with you.

Since Valentine's Day is just around the corner I wanted to show one of the cards I've prepared for this special day.  Black, red and white is one of my favorite color schemes and since Valentine's Day is all about love it's only fitting that I create using these gorgeous colors!


Thanks for stopping by!  Please be sure to visit all the stops on the hop! Click the NEXT button to go to the fabulous Dara Gloden or click the BACK button to head on over to the lovely Cathy Casey.  


Thursday, February 2, 2017

Stampin' UP! Artisan Blog Hop- Any Occasion

Hey stampers!  Welcome back to another Stampin' UP! Artisan Design Team Blog Hop.  If you are hopping with us today you probably arrived here from the fabulous Cathy Caines.  Since we are a group of 20 demonstrators from around the world- our blogs are written in many different languages.  Please be sure to use Google Translate so that you can follow along in your language.  You don't wanna miss out on any of the amazing projects that we have created to share with you!  

I actually have two projects to share with you today.  Both feature the Any Occasion stamp set from the Sale-A-Bration brochure.  This stamp set is comprised of 20 stamps.  There are 10 sentiments, several little banner pieces and a stamp that looks like string.  If you need a stamp set for literally any occasion then this is the go-to set!


The card above features several elements from the Any Occasions set.  Using the string stamp and coordinating banner pieces I was able to create a background of several different types of banners.  The Thank You banner was cut out and popped up using a Foam Adhesive Strip.  


For the card above I've used only a few elements from the Any Occasion stamp set.  I wanted to show that this set is very versatile and that using several banners/other elements isn't necessary to create a beautiful card.  I simply stamped the string image and the For You sentiment to create a tiny banner in the corner.  Very simple yet beautiful 💕

I hope that you have enjoyed my projects today!  Be sure to continue on the hop by clicking the next button below where you will magically be transported to the lovely Holly Stene.